
Last Updated on: 29th April 2022, 07:30 pm
To install SparkyLinux on a hard/usb drive run desktop’s “SparkyLinux installer” icon.
You can also use text mode installer – instead of GUI:
sudo sparkylinux-installer
1. Target system’s language
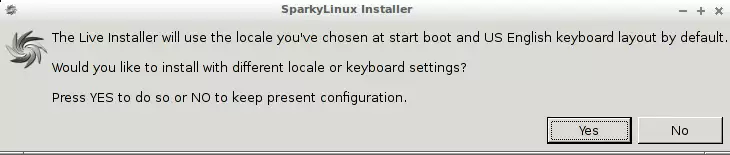
1. Run the installer and click “Yes”.

2. The installer will install the system with locales you’ve chosen at start boot and US English keyboard layout. If you’d like to change it click “Yes”.
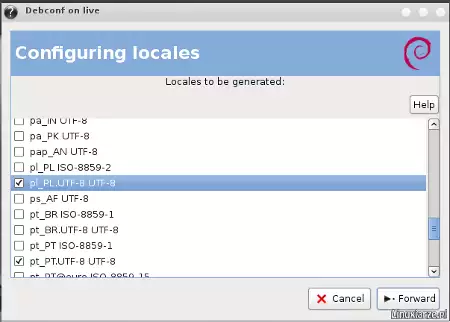
3. Mark your language and click “Forward”.
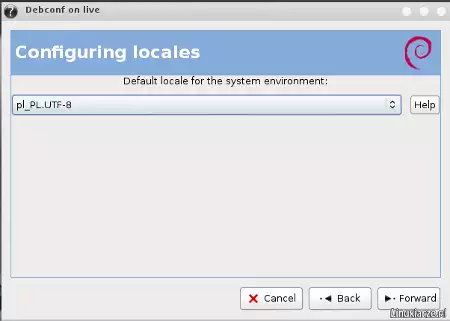
4. Choose your language if different than English.
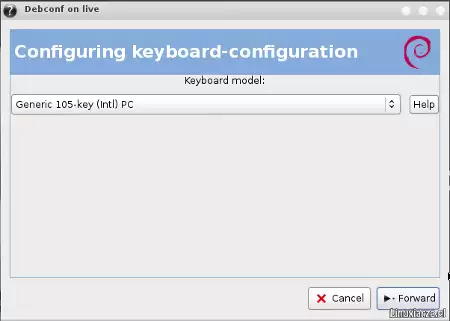
5. Choose keyboard model.
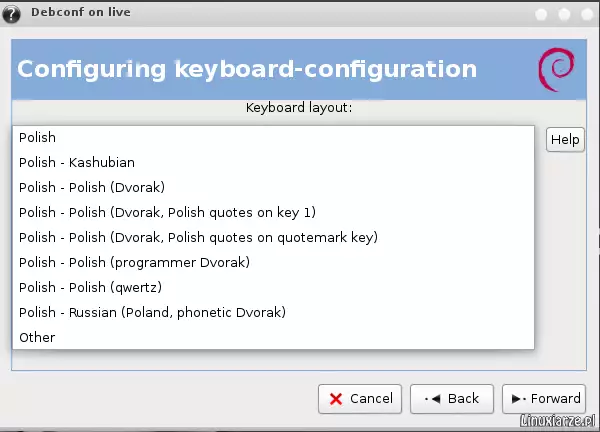
6. Change keyboard layout if different than English.

7. Choose your keyboard.
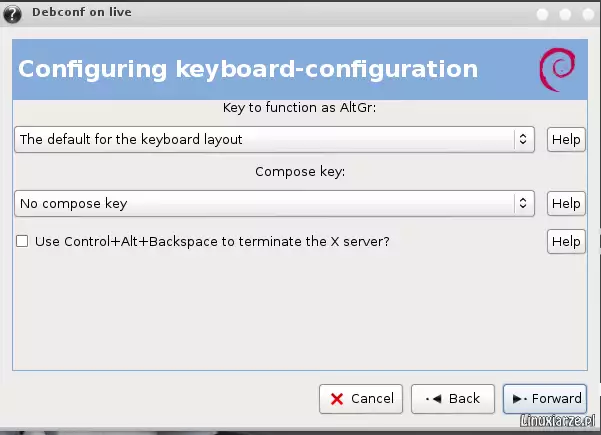
8. At this step choose default settings.
2. Partitions
9. Make preperation for new partitions for SparkyLinux.

10. Choose a disk (if you have more than one) for the new system installation.

11. GParted disk partitioner will run itself so create at least 2 partitions (maximum 3) :
– root partition “/” – minimum size 5GB (10 GB recommended) – “Eris edition”
– root partition “/” – minimum size 20GB (30 GB recommended) – “GameOver edition”
– SWAP partition – minimum size 256MB (512MB recommended)
– additionally you can create “home” partition for your personal files

12. After closing down the GParted window, choose the SWAP partition.

13. Choose the “root” partition for system files.

14. Choose file system for the “root partition” (ext4 recommended). It will be formatted.

15. Choose a partition for your “home” folder if you have one.

16. Choose file system for the “home” folder (will be formatted). If you would like to share your existing “home” partition with your other Linux account, choose “do not format”. The partition will be not formatted then.

3. Users and passwords
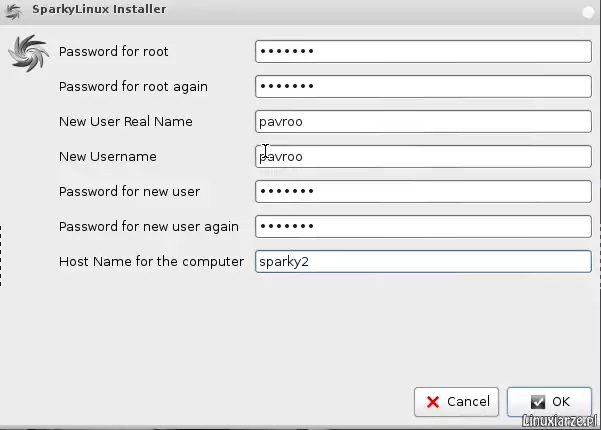
17. Now:
– type your system administrator (root) password twice
– type your real name
– type your new user nick name
– type your password twice
– type your host name
4. Bootloader
18. Choose a place for GRUB bootloader installation (MBR recommended).

5. Timezone
19. System clock settings. To set up your time zone choose “Yes”.


6. Installation
20. If all the information is correct, click “Yes” to start installation process.

21. First the newly created partitions will be formatted.

22. Now, all system files will be copied into the partitions.

23. Next, the installer will do post-installation work.

24. As the last step, the GRUB bootloader will be installed.

25. The installation process ended, reboot your computer now.

You should install a few extra language packages via Synaptic (or apt-get).
For Polish for example install:
– wpolish
– myspell-pl
– aspell-pl
– iceweasel-l10n-pl
– icedove-l10n-pl
– libreoffice-l10n-pl
For your language, replace “pl” for your country code.
Have a nice work and fun with SparkyLinux !
It seems, that x64_installer is broken. No recognition of swap or root partition. The 32-bit-version hasn’t any problems in installation. It works fine on Medion E1210 – fast with all necessary features.
Hallo
Thank’s for 3.0.2 but it’s the same Error with the Installer.
I have tested it on 2 Computers without any USB Drive
Otto
Hallo
Thank You for help, but i haven’t any usbdisk or drive connected
Otto
Wait for Sparky 3.0.2.
Hallo
I Use the 64bit e17 image. After parted the harddisk the installer don’t find them.If I in Gpartet set swap active the live cd use it but The installer dont find any harddisk.
After updating the Zour LiveCD {apt-get update and apt-get dist/upgrade} its the same.
Can You help me
Thanks
Otto
Thank’s for reporting that.
Fixing in progress.
Anyway, you can install Sparky 3.0 on a hard drive when you disconnect all USB disks.
My Problem: Wanted to install it on an usb-stick. Installer doesn’t show any partition, no sda, no usb or other at step 10. What goes wrong ?
USB installation is temporary off until the problem will be solved, sorry.Edit:
It works, I double checked it.
I installed with /home in a separate shared partition over-writing a previous linux so it has picked up some previous settings I guess. As a result I get a standard E17 desktop instead of the Sparkylinux desktop theme with Conky and the dock which I really like.
Is there any configuration script I can run or setting I can change to restore the Sparky desktop?
There is no script for that. If you really want to have my prepered e17 desktop, run sparky live and copy /home/live/.e folder. Then remove your folder /home/you/.e and put my instead yours.
x86_64
I chose to install grub on the root partition but when the box comes up telling me what it intends to do it says that grub will be installed on the MBR. I have gone through it twice with the same result.
Hello
I am really interested in trying out this distro, but can you please tell me that is UEFI booting enabled by default, I do not mean secure boot .but just GPT hard disk and grub 2 install ?
@ Ayush Joshi
I don’t know.
I never try, sorry.
@pavroo
Dziś jeszcze raz zainstalowałem Sparky’ego, tym razem w wersji 64-bit i ten sam problem. Poniżej zawartość pliku z logiem, zastanawiające jest, że pozycja GRUBLOC po znaku równości jest pusta, bo na 1000% zaznaczałem żeby grub instalował się na MBR. Instalowałem 3 razy i za każdym razem zaznaczałem instalację gruba na MBR. Instalowałem z PenDrive, może w tym tkwi problem?
==============================
Remastersys-Installer log file
==============================
LIVEMODE=DIST
==============================================================
GUI=:0.0
==============================================================
TARGETUSER=mariucho
==============================================================
TARGETHOSTNAME=SparkyLinux
==============================================================
SWAP=sda7
==============================================================
TARGETPART=sda6
==============================================================
FSTYPE=ext4
==============================================================
HOMEPART=sda8
==============================================================
HFSTYPE=ext4
==============================================================
GRUBLOC=
==============================================================
==============================================================
MOUNTS
==============================================================
sysfs on /sys type sysfs (rw,nosuid,nodev,noexec,relatime)
proc on /proc type proc (rw,nosuid,nodev,noexec,relatime)
udev on /dev type devtmpfs (rw,relatime,size=10240k,nr_inodes=505784,mode=755)
devpts on /dev/pts type devpts (rw,nosuid,noexec,relatime,gid=5,mode=620,ptmxmode=000)
tmpfs on /run type tmpfs (rw,nosuid,noexec,relatime,size=406328k,mode=755)
/dev/sdb1 on /live/image type vfat (ro,noatime,fmask=0022,dmask=0022,codepage=cp437,iocharset=utf8,shortname=mixed,errors=remount-ro)
/dev/loop0 on /live/rofs/filesystem.squashfs type squashfs (ro,noatime)
tmpfs on /live type tmpfs (rw,relatime)
tmpfs on /live/overlay type tmpfs (rw,noatime,mode=755)
aufs on / type aufs (rw,relatime,si=160832275da3e3a4,noxino)
tmpfs on /run/lock type tmpfs (rw,nosuid,nodev,noexec,relatime,size=5120k)
tmpfs on /run/shm type tmpfs (rw,nosuid,nodev,noexec,relatime,size=812640k)
/dev/sda6 on /TARGET type ext4 (rw,relatime,user_xattr,barrier=1,data=ordered)
/dev/sda8 on /TARGET/home type ext4 (rw,relatime,user_xattr,barrier=1,data=ordered)
==============================================================
FDISK listing
==============================================================
Disk /dev/sda: 320.1 GB, 320072933376 bytes
65 heads, 3 sectors/track, 3205858 cylinders, total 625142448 sectors
Units = sectors of 1 * 512 = 512 bytes
Sector size (logical/physical): 512 bytes / 512 bytes
I/O size (minimum/optimal): 512 bytes / 512 bytes
Disk identifier: 0x14cdf572
Device Boot Start End Blocks Id System
/dev/sda1 * 3 204799724 102399861 7 HPFS/NTFS/exFAT
/dev/sda2 204799726 625141759 210171017 f W95 Ext’d (LBA)
/dev/sda5 204799728 499126094 147163183+ 7 HPFS/NTFS/exFAT
/dev/sda6 499126272 540084223 20478976 83 Linux
/dev/sda7 540086272 542181375 1047552 82 Linux swap / Solaris
/dev/sda8 542183424 625141759 41479168 83 Linux
Disk /dev/sdb: 4009 MB, 4009754624 bytes
124 heads, 62 sectors/track, 1018 cylinders, total 7831552 sectors
Units = sectors of 1 * 512 = 512 bytes
Sector size (logical/physical): 512 bytes / 512 bytes
I/O size (minimum/optimal): 512 bytes / 512 bytes
Disk identifier: 0x000de9ae
Device Boot Start End Blocks Id System
/dev/sdb1 * 62 7826383 3913161 b W95 FAT32
==============================================================
live config listing
==============================================================
export LIVE_USERNAME=”live”
export LIVE_USER_FULLNAME=”Live session user”
export LIVE_HOSTNAME=”live”
==============================================================
End of Log
==============================================================
Tak, GRUBLOC jest pusty, więc lokalizacja instalacji GRUB-a nie została wybrana (pomimo, że ją zaznaczyłeś). Problem na 99% tkwi w penie. Testowałem Sparka na kilku penach, ale tylko na jednym działał poprawnie. Najlepiej jednak działa uruchomiony z płyty DVD.
Dziś jeszcze raz spróbowałem zainstalować i znów instalacja przebiegła poprawnie, po restarcie pojawił się napis “Grub” i laptop zawisł. I tak za każdym uruchomieniem. W tej chwili niestety nie mogę przesłać tego logu, gdyż wyczyściłem partycje, ale spróbuje jeszcze raz zainstalować i postaram się przesłać log. Sparky jest drugą po Arch Linux dystrybucją, podczas instalacji której nie mogłem zainstalować grub’a.
mariucho
@mariucho
To pierwszy przypadek, w którym wystąpił problem z instalacją GRUB. Czy zaznaczyłeś/podświetliłeś MBR podczas instalacji? Trudno coś w ciemno wnioskować. Najlepiej jakbyś mógł przesłać log utworzony podczas instalacji, który znajduje się w: ‘/var/log/remastersys-installer.log’
pavroo
We can continue the conversation in Polish, because English is not my favorite language 🙂
@pavroo
I installed the 32-bit version. I did not notice any errors during installation.
I have a problem. The installation proces ran correctly, but did not install the GRUB. After restarting the laptop displays a black screen. Grub installed in the MBR.
What version have you installed? 32 or 64 bit?
Have you hightlighted MBR at GRUB installation window correctly?